How to add a collaborator
You bring someone into your organization by sending an invite from the IAM screen. The invite creates the person, grants their access, and sends them an e-mail to set their own password.
Prerequisites
- The
iam:users:invitepermission. - A decision on which group this person needs and where it applies. See What is IAM.
Open the invite
Go to IAM, stay on the Users tab and click New user in the top right corner.
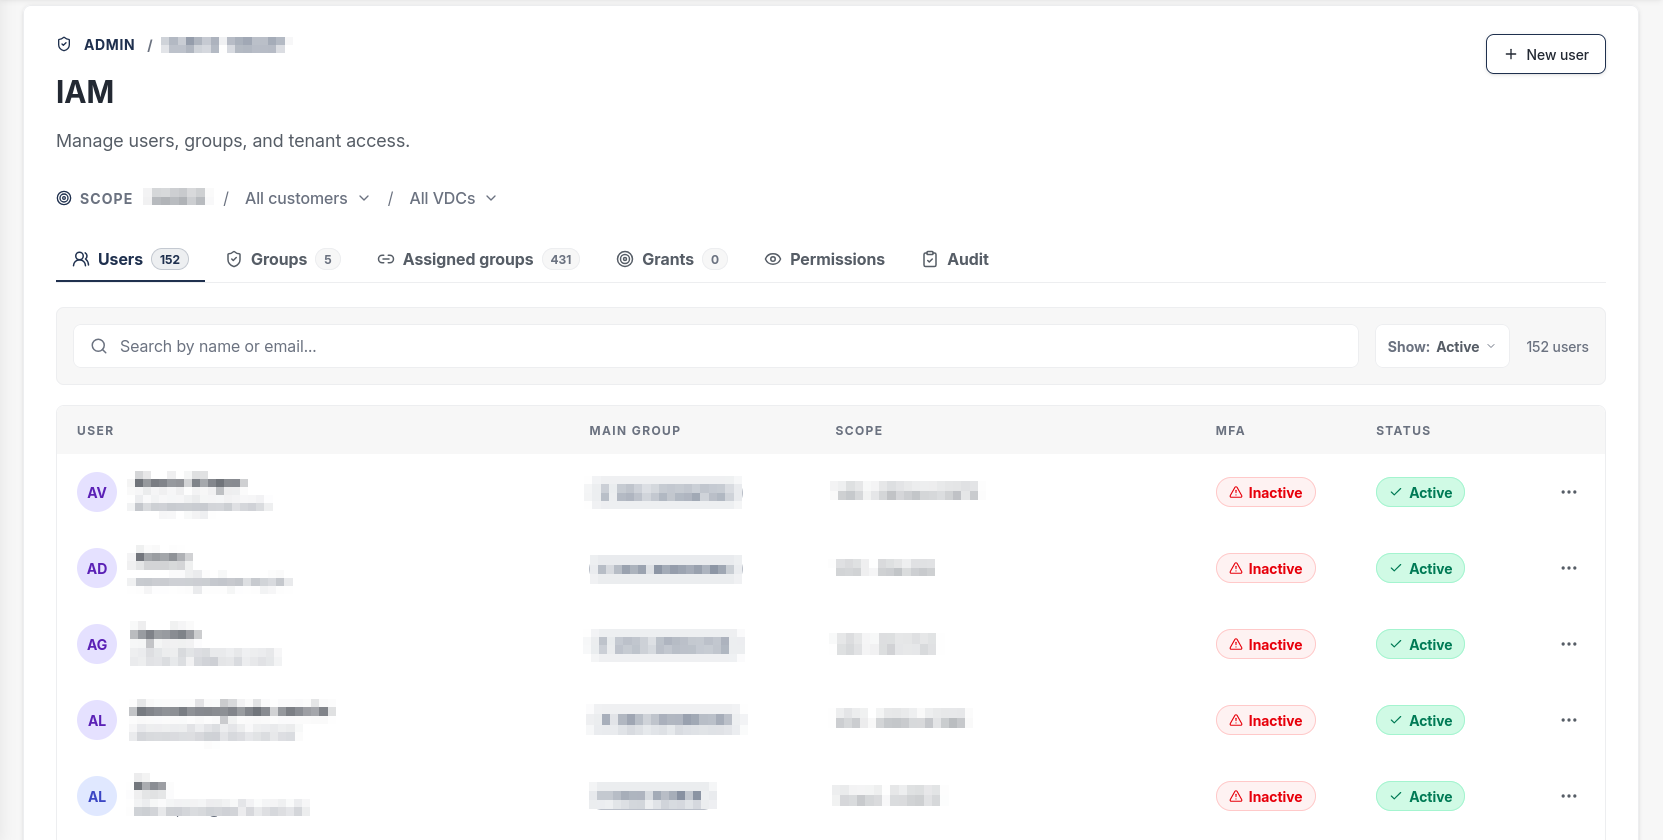
The invite runs in four steps.
Step 1: Identity
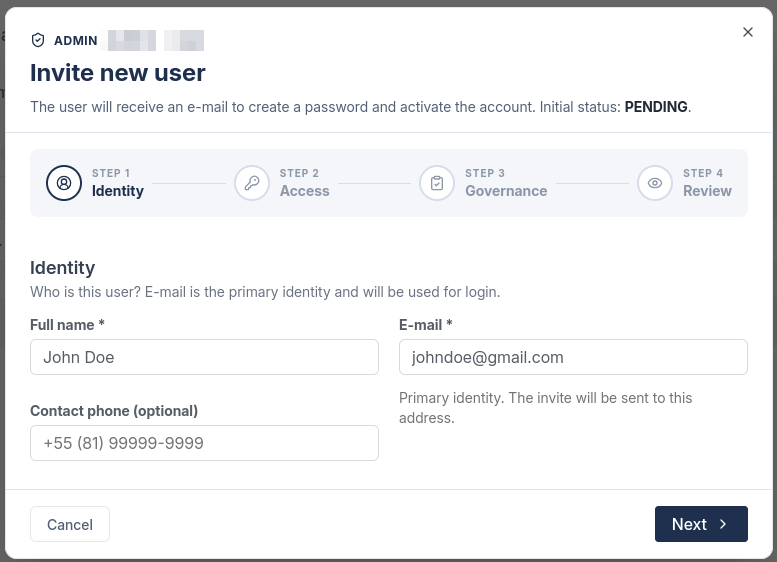
Fill in the Full name and the E-mail. The e-mail is the primary identity: it is what the person will use to sign in, and where the invite is sent. The contact phone is optional.
Step 2: Access
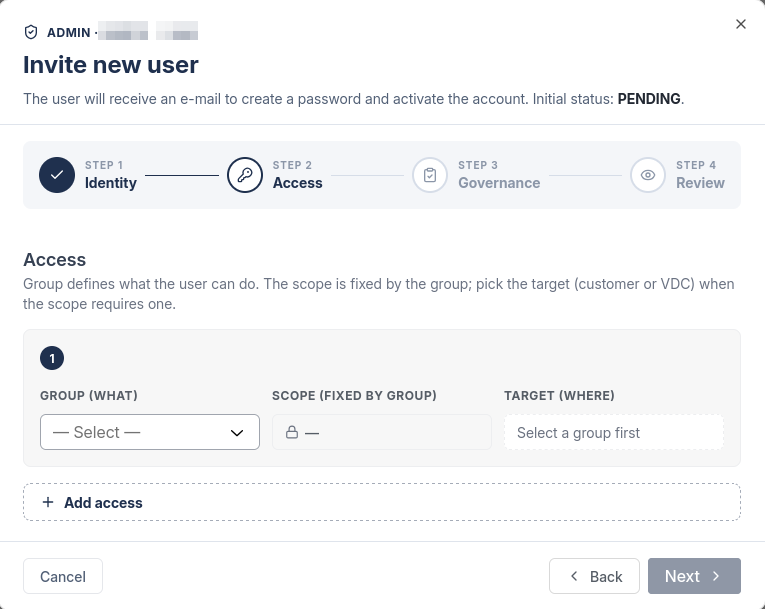
Here you choose what the person will be able to do:
- Group (what) defines the set of permissions.
- Scope is filled in for you. It is fixed by the group you picked, so there is nothing to choose.
- Target (where) is the customer or VDC the access applies to. It stays disabled until you pick a group.
Use Add access to give more than one group, for example an operator on two different VDCs.
You can also leave this step empty and grant access later. The person will be created without permissions.
Step 3: Governance
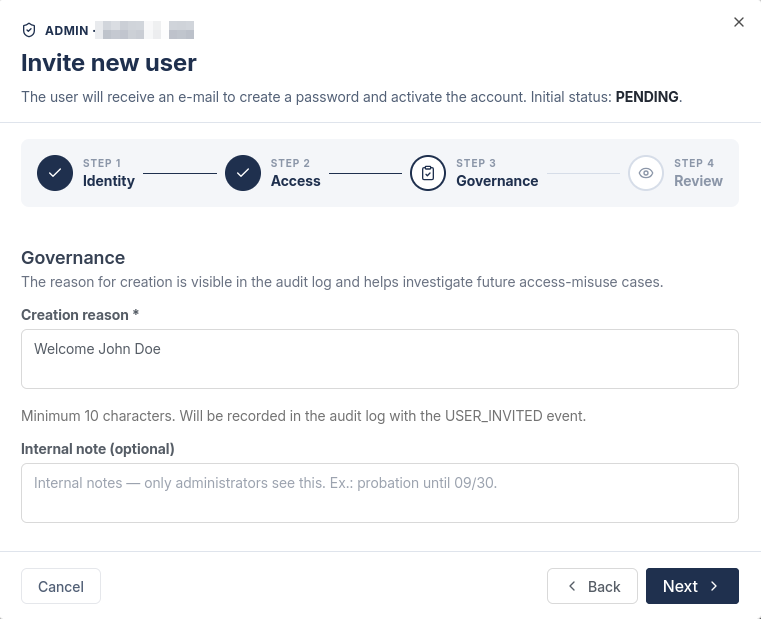
Write the Creation reason. It is required, needs at least 10 characters, and is recorded in the audit log as a USER_INVITED event. Write something that will answer a question six months from now, such as the ticket number and why this person needs the access.
The internal note is optional and only administrators see it.
Step 4: Review
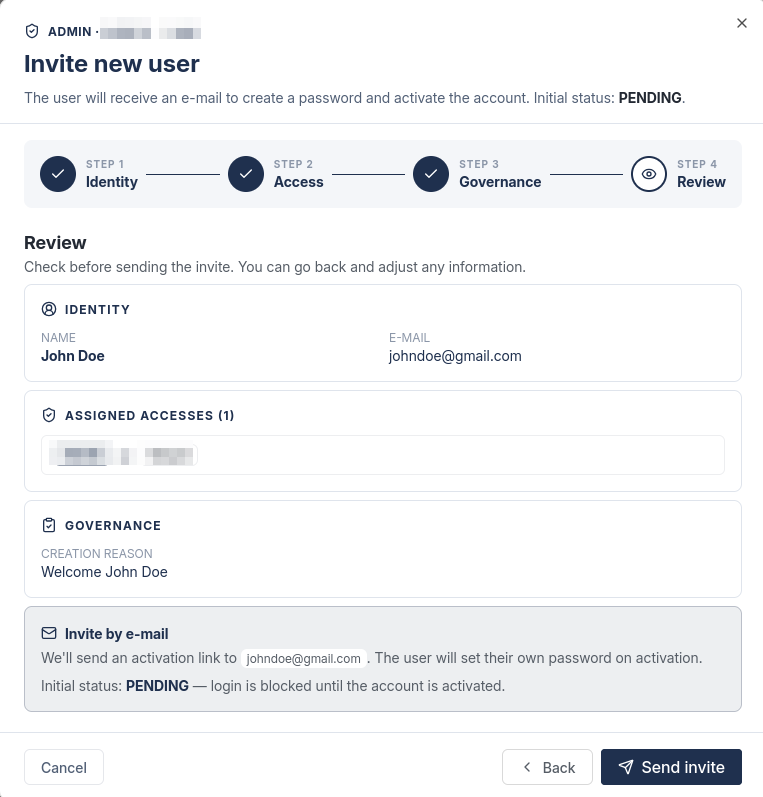
Check the summary and click Send invite.
What the person receives
The account is created with status PENDING, and sign-in stays blocked until it is activated. The person gets an e-mail with an activation link, and by following it they set their own password. You never see or define it.
Once they finish, the status changes to active and the access you configured is already in place, with no further action from you.
If the e-mail does not arrive, resend it from the person's row on the Users tab. There is no need to create a second invite, and resending only works while the invite is still pending.
Notes
- You only hand out groups within the scopes you administer. If a group you expected is missing from the list, you do not hold it at that target.
- Access takes effect on the person's next sign-in, so there is no delay on a brand new account.